
Gold Leaf Workshop with Jamie Kamph
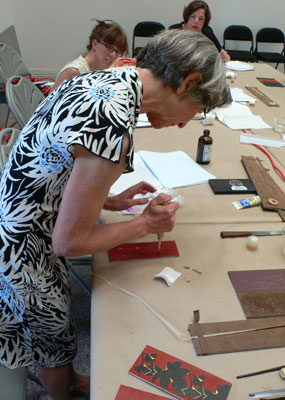
 During the Degolyer conference Jamie Kamph led us in a demonstration in gold leafing leather surfaces. This workshop was great fun and I learned a great deal. She shared with us some of her tools and methods that made the process less time consuming and more efficient.
Tools needed:
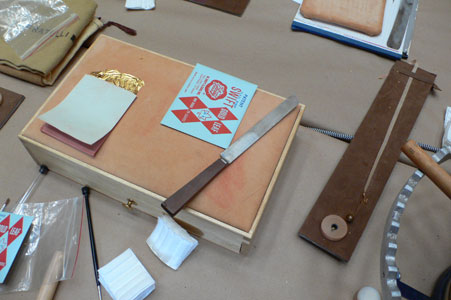
- Gold cushion
- Brass gilding tools
- Gold knife
- Heating element for gilding tools
- Fixor glaire
- Cotton pads
- Water
- Fine point sable brushes
- Gold leaf - 22 or 24 carat rolls or sheets
- Board with half crocus cloth and half ultrasuede
- Vaseline
- Fine binding needles
- Pen vise with blunt needle for cleaning off excess gold leaf
The basic steps are as follows:
- Draw out the cover design on grided vellum
- Do an initial blind tooling on the leather when it is dry through the vellum
- Wet the leather bookcase
- Blind tool freehanded over the previous tooling
- Apply the Fixor into the blind tooling
- Load a heated gilding tool with the gold leaf
- Apply the warm tool with the gold leaf to the leather
- Wipe loose gold leaf with cotton pad
- Clean excess leaf with blunt needle
Grided vellum can be purchased at any art or architectural supply store. It is great to use when drawing out a design for a leather cover. If you get the larger size sheets, you can wrap the sheet around the leather bookcase to see how the design will fit on the whole leather case.

Step 2: Transfer the design to the leather
The leather has been adheded to the appropriate thickness of davey board for the book case. Lay the vellum on dry leather. Use a warm brass tool to impress the design onto the leather. This will create faint marks to guide you when blind tooling later. It also gives you leaway to correct any tooling mistakes more easily.
 Step 3: Wet the leather
Use the cotton pads dipped into water to moisten the leather surface. It does not need to be soaked just moist. The leather will look darker after it has been wetted depending on the finish of the leather. Vegetable tanned leathers, like the skins Harmatan produces, absorb the water more readily than chemical tanned leathers that use metallic bases.
Step 4: Blind tool the design
With the brass tools, carefully go over the original design marks. This is called Blind Tooling. Because the leather is wet the impression will become more pronounced. Blind tooling creates an embossed look in the reverse.
Jamie has a nice tip if the tooling is not to you liking. Use a very fine needle attached to a pen vise to slide into the tooled depression. It needs to go in further than just the tip but not the full length of the needle. Lift gently. The leather should float up as the moisture of the leather seeps into the depression.
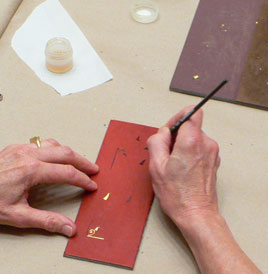 Step 5: Apply the Fixor glaire
Fixor has the adhesive qualities to bind the gold leaf to the leather surface. Jamie recommeded Bookmakers as a supply source for Fixor. She also stressed to purchase the Fixor in glass bottles rather than plastic. Be sure to keep it out of the sun as it will go cloudy and the adhesive properties are lessened.
She dilutes the Fixor with water in 50-50 proportions. It should turn a cognac color. This mixture goes a long way in coverage. When kept out of the sun, it will last several weeks. If the mixture becomes cloudy, Jaime suggests using a drop of ammonia to clear it.
Select a fine point sable brush to apply the Fixor glaire into the blind tool impressions. Then let the glaire dry before application of the gold leaf.
 Step 6: Loading the gold leaf
The heater keeps the brass tools warm but not hot. If the tool is too hot it will burn the leather as it makes the impression. I believe Jamie kept the temperature of the heater around 200 degrees.

Jamie has a nifty, easily made, tool to help with the gilding process. A little board about 8"x10" covered with half crocus cloth and half ultrasuede. Crocus cloth is a micro fine sandpaper. It is used to gently polish gold leaf off the brass tool without marring it.
With a bit of vaseline on the tip of your finger, lightly apply to the ultrasuede in a zig zag motion. The warm brass tool is passed across the sueded surface once or twice. This coats the tool surface with a sheen of oil that the gold leaf lightly adheres to. By lightly, but firmly, pressing the tool onto the gold leaf, it will stick to the tool.

Jamie uses both the gold leaf sheets as well as the rolls. She prefers the rolls due to the fact there is less waste of leaf and a bit more manageable. Gold leaf is so light that the slightest puff of air will send it floating around the room. She has made another handy device, covered with suede, that holds the gold leaf rolls at the top. The roll tape with the gold leaf is lead down the board and tucked into an elastic band at the bottom. It makes it easy to load the tool with the gold leaf.
 When you load the tool, more than likely, a bit of trailing leaf will fringe the tool. The fringe can be gently patted down on the tool with a cotton pad. Getting this "fringe" out of the way lets you see where you are applying the gold to the leather.
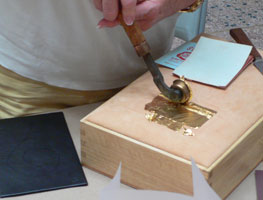
Step 7: Apply the gold to the design

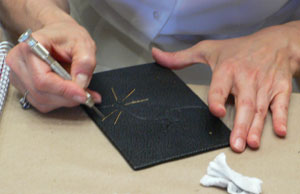
Using firm pressure apply the loaded tool to the blind tooled impression. Rock the tool slightly in all directions before coming center, holding momentarily and lifting. Or if you are using the line tool, roll slowly along the blind tooled line. You should see the gold being transferred to the design.
Ideally, the transferred gold leaf should have a crisp edge with a smooth, flat surface in the impression. Sometimes the gold will crack or lift. If it does this, reheat the tool, then reload the gold leaf and apply a second layer over the first one. If it still is rough, reapply a second coat of glaire before applying a third layer of gold leaf.
Step 8: Wipe the loose leaf
With a soft cotton pad, wipe off the loose gold leaf fragments from the tooled design.
Step 9: Clean off excess leaf
Jamie used a blunted darning needle locked in a pen vise to gently clean off the excess gold leaf that can stick to the edges of the blind tooled impression. The pen vise you can get at almost any good hardware store. I also have a favorite tool that I purchased from a local leather store. It looks like a stylus with a slightly rounded, bent tip. Either tool, used carefully, will not scar or scratch the leather as you clean the edges.
posted by EKibby | 9:07 PM
![]()
0 Comments:
Post a Comment
<< Home